Posts

Showing posts with the label proteus

Learn How To Make A Digital Voltmeter Using Arduino

Image
Arduino is very popular and easy to use. With Arduino, we can do lot's of projects and experiment. So today we add one more projects in our Arduino project list. In this article, we are going to make a digital voltmeter.using an Arduino board. In this project, we measure the input voltage range between 0 to 50V by using the voltage divider. It is very simple to use Arduino as a voltmeter. Arduino UNO has  5 analog pin to read the input analog value. If we have an idea about reference voltage then we can easily measure the input voltage. Here we will use 5V as a reference voltage. Block Diagram Block Diagram of DC Voltmeter Component Required  1 * Arduino Board(In this article we use Arduino UNO) 1 * LCD Module(Here we will use 16 * 2 LCD Module) 1 * 100K Resistor  1* 10K Resistor 1 * 5K Potentiometer Some jumper wires Breadboard  Circuit Diagram Circuit diagram of this projects is very simple and easy to understand. Here we use a 16 * 2 LCD module to display the...

Arduino Distance Measurement Using Ultrasonic Sensor

Image
We all know about the ultrasonic sensor and also wanted to play with it, but don't know how ultrasonic sensor works. So In this article, we will see  how to use an ultrasonic sensor with your projects. The ultrasonic sensor is very popular among arduino hobbyist and there are so many projects which you will be able to do at the end of this article. Description of HC-SR04 Ultrasonic Sensor Ultrasonic Senso r can measure the distance from 1" to 13 feet( 1 cm to up to 4metre) with accuracy up to 3mm. A hc-sr04 ultrasonic sensor has 4 pin GND, VCC, Echo and Trigger Pin. Trig pin generate an ultrasound by setting trig pin on the high state of 10 microseconds. Echo pin produce an output in a microsecond when ultrasound returns back from the object to echo pin. We can calculate the distance by using simple formula Speed=(Distance/Time). The speed of the sound is 340m/s and thus by calculating ultrasound travel time we can calculate the object distance from the ultrasonic sensor. Requ...

How To Interface Relay With Arduino

Image
A Relay is an electromagnetically operated switch. Relays are used to control a circuit. Many relays consist a coil, a yoke, and an armature. When a current is passed through the coil, a magnetic field is induced in the coil which moves the armature and relay start its switching function. A normal relay has NO(normally open), NC(normally connected), COM and coil pin within it. A Simple one channel relay is shown in below image Relay Required Components For designing a relay driver circuit you will need following components  Relay 1N4007 Diode BC547 Silicon NPN transistor 10K Resistor  Circuit Diagram A simple relay driver circuit is shown in below image. Here we use an NPN BC547 transistor to drive the relay.Base current ought to be a lot of enough to turn on a transistor. A diode 1N4007 use among the circuit to protect the transistor from damage due to back emf. When relay is in off state, COM pin of  Relay Driver Circuit  a relay is connected to NC(normally connect...

How To Interface LDR With Arduino

Image
Hello, Friends hope all of you playing with your arduino and currently need to try to do another cool projects on arduino. Therefore, this tutorial is for you. During this tutorial, we interface LDR(Light dependent Resister) with the arduino board. It is very simple tutorials for arduino students, hobbyist, and beginners. Before going more we must find out how LDR is dependent on Light. What is LDR  LDR(Light dependent Resister) or a photoresistor is a light dependent variable resistor that resistance decreases with the increase in the intensity of light. This gives an analog value so that it is connected to an analog pin of arduino board. A simple LDR is shown within the image and to buy an LDR click on the below image Circuit Diagram A simple circuit diagram is shown in the image. We won't use LDR directly within the circuit in order that a potential divider circuit is used with a 10K resistor. In this circuit one pin of LDR is connected to Analog pin A0 of arduino UNO and ...

How To Display Custom Characters On LCD Using Arduino

Image
We all are aware of custom characters used in the various display module.Heart, various style of smileys, arrow are the foremost usually used custom characters. Thus, during this tutorial, we are going to learn how to display custom characters in LCD using arduino UNO board. This project is done by using of arduino UNO board and 16*2 LCD module. Custom Character Display It is assumed that reader knows  how to interface LCD with arduino  and  how to install arduino software .We can generate a completely different style of the custom character using the below pixel array shown in the image.  Pixel array the custom character shown below that is used in our program to generate the smile type character:          {                 0b00000,                 0b00000,                 0b01010,             ...

Interfacing Push Button Switch to Arduino

Image
There are many electronic circuits can be used to interface with the device in the real world using switches as inputs. The simplest type of interfacing device is push button switches due to its low price and simple interfacing with any kind of electronic circuit. Push button switches are widely used in many electronic projects so knowledge of their interfacing is extremely essential in designing projects. So during this article, we learn how to interface push button switches with arduino. I hope you have knowledge about Arduino Board  and led interfacing. Push button has four terminal and its allow current to pass through it when you press it down.  Push Button Here we use PULL-UP or PULL DOWN resistor while using switches. PULL-UP register is a register connected between power supply and connector to give an electricity on certain condition.To understand the working of Pull-UP resistor look the image how its work. Pull-Up Resister REED THIS ARTICLE   Interfacing LC...

Controlling LEDs With PC Using Arduino

Image
Wireless communication plays a very important role within the communication system. We may be able to send data from one point to another point simply through wireless communication. There is such a large option available for the wireless communication like Bluetooth, Wi-Fi etc. In this article, we concern only in Bluetooth. Bluetooth is a standard wireless technology which transfers the information over very short distances. It is assumed that you just ought to knowledge to  How To Send Serial Data From Arduino To Laptop or PC  and  How To Receive and Send Serial Data Using Arduino Board After Reading this article you will be able to control LED via your PC/Laptop. For controlling the led we use arduino board  Introduction to Arduino Board .  Circuit diagram: Here we use three led blue, green and red that are connected to pin no. 10,9 and 8 of arduino board respectively. We also connect an LCD display module to arduino board. read this post for  Int...

How To Receive and Send Serial Data Using Arduino Board

Image
Serial communication is the easiest way to communicate with the peripheral device in embedded system. Thus, during this article, you may be able to learn the way to receive and send serial data from the arduino board. If you are beginner then first read this Introduction to Arduino Board  and How To Send Serial Data From Arduino To Laptop or PC  before moving on this article. Arduino ide has such a big amount of inbuilt function for serial communication and detail of some function are here   How To Send Serial Data From Arduino To Laptop or PC . During this article, we tend to use some additional function that facilitates us to receive the serial data from the serial port. These functions are Serial.available(), Serial.read(), Serial.write whose explanation are given below: 1: Serial.available() This function is always used before the Serial.read() function. This function returns always a positive value once reception is complete. This function is used for whether or...

How To Send Serial Data From Arduino To Laptop or PC

Image
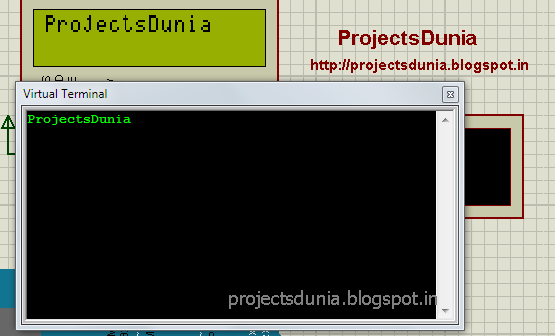
Serial Communication plays important role within the communication system. All micro-controller should have serial communication port.Serial communication provides a text-user-interface(TUI). One will use serial port of microcontroller to send data serially to laptop/PC or receive data serially from laptop/PC.Here we use arduino board to communicate with the laptop. Arduino board have a minimum of one serial port to communicate known as UART and USART. It communicates with digital pin 0 and 1 of arduino refer to as RX and TX pin as well as with the computer via USB. Virtual Terminal Interfacing LCD With Arduino UNO Arduino has a built-in function for serial port thus there is no need to go into register detail. In Arduino IDE, one can easily call the serial function for the serial port and job is finished. A simple connection for serial communication is shown below Connection For Serial Communication For serial communication with arduino, we have to use three function known as Serial.b...

How To Interface Seven Segment Display With Arduino

Image
A seven segment display is an electronic display device for displaying numeral. Seven segment display are widely used in the digital clock, TV, electronic meter and other electronic devices which display numerical value. Simple seven segment display image is shown below: Seven-segment Display may be used in two modes: 1: Common anode ( all of the positive terminal are connected)  2: Common cathode (all of the negative terminal are connected) In this tutorial, we tend to use common cathode mode to display the numerical number. Interfacing LCD With Arduino UNO Circuit diagram Arduino pin 2,3,4,5,6,7,8,9 is directly connected to a,b,c,d,e,f,g,h data pin of seven segment display as shown in image: Circuit Diagram Program Code for one digit count down timer from nine to zero is written in arduino ide as shown in image. Code Copy or download the code and paste it within the empty sketch of arduino ide and so compile the sketch and upload it to your board. Now enjoy count down timer using...

How to Use A Temperature Sensor With Arduino

Image
A thermometer is a device measures the temperature. A Thermometer consists a temperature sensing element that senses environment temperature and provides the result to the suitable devices. During this article, you may tend to learn to make a digital thermometer using LM35 temperature sensor and LCD module display.For LCD interfacing with arduino read this article  Interfacing LCD With Arduino UNO    LM35 : LM35 Temperature Sensor  LM35 is a temperature sensor that is employed to measure the temperature. It has three terminal Vcc, Output, Ground as shown in the above image  The range of the LM35 temperature sensor is from -55 'C to +155 'C. The output range varies by 10mV to each fall and rise in temperature. Circuit diagram of Digital Thermometer using LM35 temperature sensor with arduino UNO is shown below:  Automatic Temperature Fan Speed Controller   Circuit diagram It has a very simple circuit. The output terminal of the sensor is connected to th...

How To Interface LCD With Arduino UNO

Image
LCD module is incredibly common part at intervals embedded system design.16*2 alphanumeric LCD module is most generally used  alphanumeric LCD module at intervals the embedded system. LCD module employed in wide selection of applications well as consumer devices such as DVD player,television,clock,gaming devices and watches.There are 16 pin available and may be operated in 4-bit and 8-bit mode. Here we have tendency to victimization LCD module in 4-bit mode. The schematics of simple 16*2 LCD module is shown in below image The name and function of every Pin of LCD module is given below: Pin1(Vss): Ground pin of LCD Module Pin2(Vdd):  +5v supply is given to this pin Pin3(Vee): Adjust contrast of LCD. +5v supply is given for full contrast. Blink Multiple LED Simultaneously Using Arduino Pin4(RS): Resister select pin in LCD module. There are two register command register and data register. Logic High for data register and Logic Low for command register.  Pin5(R...

How To Blink a LED Using Arduino

Image
LED is Light Emitting Diode play a really necessary role within the embedded system design. A Diode is a two terminal component within which current flow from the positive direction to negative direction. During this article, we tend to find out how to interface an LED with an Arduino. Simple LED is shown in the image. LED In this tutorial, I will able to show you to run three LED at the same time using your Arduino board.  Component Required: Arduino UNO Board 3 LED Wire Power Supply How to Install An Arduino Library For Proteus Circuit diagram: Circuit diagram of interfacing LED with Arduino board for running three led at the same time is shown below: Circuit Diagram NOTE: Add a current limiting register in series with led to prevent it from damage. Positive(anode) terminal of the LED is connected to the 11,12 and 13 pin( digital pin) of the Arduino board as shown within the circuit diagram. Negative terminal of the LED is connected to the Ground.The code is written within the Ar...

How to Install An Arduino Library For Proteus

Image
Arduino is a terribly famed microcontroller board. Each engineer, student or hobbyist needs to verify it projects design in real time environment before assembling it on real hardware. Proteus is that the initial alternative for this however in Proteus software there's no library available for the Arduino. Therefore, during this article, you find out how to verify your Arduino project in Proteus by using the Arduino library. First of all, you have got to download the Arduino library for the Proteus software. For this, you will be able to search on Google or download from  here . After downloading the file extract the .rar file and copy the two file name as Arduino.idx and Arduino.lib  Now paste the copied file in the subsequent path      Drive C >> Program files >> Labcentre Electronics>> Proteus 7 Professional>>Library If you want to buy an Arduino development board then you can buy your first Arduino board from here ARDUINO Now open Pr...

How To Install Proteus Software On Windows

Image
Proteus is an Electronics design and simulation software developed by the Labcenter Electronics. Engineering student or hobbyist will design and check their project on Proteus software before assembling it on hardware. To install  Proteus software on windows follow the below instruction: Download the Proteus software setup from here  and double click on the setup.exe file as shown in below image Setup After few minute step can complete here you'll install the  license key  that ought to be valid for the Proteus software. Here you choose "use a locally installed license key". Currently, one in all two window is open. It'll be either window with already installed key or no key installed. If you get a window with an already installed key then simply click on the "next" and at the last click on the end to finish the installation. How To Interface LCD With Arduino UNO Currently, if you get a window with no key installed then initial download the license key...